Quickstart
Note: The Pigeon WordPress plugin in JS mode sets up the implementation for you.
The following example will initialize the plugin on your site:
<script src="//ajax.googleapis.com/ajax/libs/jquery/3.6.1/jquery.min.js"></script>
<script type="text/javascript" src="//demo.pigeonpay.io/c/assets/pigeon.js"></script>
<script type="text/javascript">

var Pigeon = new PigeonClass({
	subdomain:'demo.pigeonpay.io',
	fingerprint:true,
	idp:true // true if subdomain does not share the same primary domain this script is installed on
});

Pigeon.paywall({
	// redirect: true || 'modal' Setting true or false tells Pigeon whether to redirect to
	// preset promotional page or not. Setting 'modal' tells the page to popup the
	// standard promotional dialog.
	redirect:'modal',
	free:false, // default: false. Setting true overrides the Pigeon Cloud presets, allowing this page to be free.
	success:function(response){
		// do stuff here with response
		// See Pigeon Response Reference in documentation for available variables.
	}
});
</script>
Content Wrappers
Use one of the following two scenarios in your HTML/templates to protect your code when a visitor does not have access.
Scenario 1 - Remove all content
This wrapper will remove all the content within the wrapper.
<div class="pigeon-remove">
	<p>All content with a class of pigeon-remove will be removed if the visitor is not authorized.</p>
</div>
Scenario 2 - Remove one or more paragraphs
This wrapper will look for the first X number of paragraphs to keep, then remove the rest of the wrapped content.
Example: One paragraph kept
<div class="pigeon-remove" data-pn="1">
	<p>The content of your article. Only this paragraph will show if the visitor is not authorized.</p>
	<p>This paragraph and any subsequent content will be removed if the visitor is not authorized.</p>
</div>
Example: More than one paragraph kept
<div class="pigeon-remove" data-pn="3">
	<p>Keep</p>
	<p>Keep</p>
	<p>Keep</p>
	<p>This paragraph and any subsequent content will be removed if the visitor is not authorized.</p>
</div>
Promotional Wrapper
The following wrapper will show when a person does not have access. You can put your promotional copy and calls to action in there.
<div class="pigeon-context-promotion" style="display:none;">
	<!-- This is where you can promote your content. -->
	<!-- The link with a class of pigeon-open will open the pigeon modal -->
	<p>This page is available to subscribers. <a href="#" class="pigeon-open">Click here to sign in or get access</a>.</p>
</div>
Init
var Pigeon = new PigeonClass({
	subdomain:'demo.pigeonpay.io'
});
Settings
| subdomain | type: string required The Pigeon subdomain identified during setup. |
| fingerprint | type: bool default: false True turns on browser fingerprint to reduce cookie removal fraud in soft paywall scenarios. |
| idp | type: bool default: false Set to true when pointing to a Pigeon subdomain that is not in the same context of the primary calling domain. |
Paywall
Pigeon.paywall();You can further customize the paywall settings with the settings below.
Settings
| free | type: bool | integer default: false Setting true overrides the Pigeon Cloud presets, thus allowing this page to be free. When using integer 0 == false, 1 == true, and 2 == restricted. Use the value 2 to make sure a page is restricted in a metered paywall scenario. In other words, that page cannot be metered, it requires enabled or paid access to view. |
| redirect | type:bool or string default: true Setting true or false tells Pigeon whether to redirect to preset promotional page or not. Setting 'modal' tells the page to popup the standard promotional dialog. |
| success | type: function( response ) The response function that is called after the authentication check has completed. See Pigeon Response Reference for available variables. You can use Pigeon.paywallPromise (jQuery promise as seen below) to run code on the callback response elsewhere in your code. |
| ignoreBodyHide | type: bool defualt: false True doesn't hide the body onload while paywall decides what to do. |
| contentId | type: Integer or string default: 0 Used in on-demand scenario. The unique id you use for the page or particular product. |
| contentTitle | type: string default: '' Content title used for identifying content in a nice way. |
| contentDate | type: string [YYYY-MM-DD HH:ii:ss] default: '' Content date used for time based access scenarios. Calculations are done based on the timezone set in your account from Settings > Environment. |
| contentPrice | type: integer or float default: 0 Used for the content price on-demand |
| contentValue | type: integer default: 0 Used for the content value meter. Used in the credit or voucher-based scenario. |
| contentPrompt | type: bool default: false If true then prompt before taking credit on content value meter. |
Callbacks
You can use jQuery promises to do stuff with the callback response. Refer to the Response Reference section to see what variables you can use.
// Need to use paywall callback somewhere else in the code. You can use the Deferred promise
$.when( Pigeon.paywallPromise ).then(function(response){
	if( response.user_status ){
		// User is logged
	}

	if( response.allowed ){
		// User has access to the content
	}else{
		//Pigeon.widget.promotionDialog('open');
	}
});

// Another way to do it
Pigeon.paywallPromise.done(function(response){
	if( response.user_status ){
		// User is logged
	}

	if( response.allowed ){
		// User has access to the content
	}else{
		//Pigeon.widget.promotionDialog('open');
	}
});
Widget
Pigeon Widgets allow you to control user status and sales funnel display.
widget.status()
This sets up an HTML unordered list that shows the user status. There are two formats, Standard and Sticky. Simply add the following HTML block as the placeholder for the widget. Style to match your site.
Standard Layout
<nav class="pigeon-widget-status"></nav>See a styled example here (see it in action at PigeonDaily):
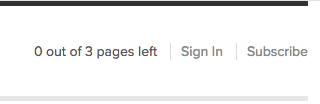
The HTML rendered in the above example. You can style to match your site's design.
<nav class="pigeon-widget-status">
    <ul>
        <li class="credits" style="display:none;"><a href="//my.pigeondaily.com/user"></a></li>
        <li class="meter" style="">0 out of 3 pages left</li>
        <li class="group-ip-access" style="display:none;"></li>
        <li class="account" style="display:none;"><a href="//my.pigeondaily.com/user">My Account</a></li>
        <li class="login" style=""><a href="//my.pigeondaily.com">Sign In</a></li>
        <li class="subscribe" style=""><a href="//my.pigeondaily.com">Subscribe</a></li>
        <li class="logout" style="display:none;"><a href="//my.pigeondaily.com/action/public/vo/logout">Sign Out</a></li>
    </ul>
</nav>
This layout allows you to customize status widget to match the look of your site. This example style will get you started.
<style type="text/css">
    .pigeon-widget-status { float: right; margin: 2px 33px 0px 15px; }
    .pigeon-widget-status ul { margin: 0; padding: 0; }
    .pigeon-widget-status ul li { float: left; list-style: none; }
    .pigeon-widget-status ul li a { color: #666; border-left: 1px solid #dcdcdc; padding-left: 10px; margin-left: 13px; }
    .pigeon-widget-status ul li a:hover { color: #517ABA; }
    .pigeon-widget-status ul li:first-child a { border: none; padding: 0; margin: 0; }

    @media only screen and (max-width: 720px) {
       .pigeon-widget-status {
          float: none; width: 100%; margin: 0; padding: 10px 20px 20px 20px; overflow: hidden; box-sizing: border-box;
       }
    }
</style>
Sticky Layout
This will stick at the top of the browser and go away when scrolling down, then show back when scrolling back up. When logged in the bar only shows user status when at the top or bottom of the browser.
<nav class="pigeon-widget-status pigeon-widget-status-sticky">
    <div class="pigeon-widget-status-wrap wrap"></div>
</nav>
This is example style for the Sticky Layout:
<style type="text/css">
    .pigeon-widget-status { position:fixed; height: 42px; padding: 10px; width: 100%; background: #000; z-index: 999997; font-size: 14px; text-align: center; }
    .pigeon-widget-status ul { display: inline-block; margin: 0 auto; padding: 0; float: right; }
    .pigeon-widget-status ul li { float: left; list-style: none; color: #CDCDCD; }
    .pigeon-widget-status ul li a {color: #cdcdcd; border-left: 1px solid #585858; padding-left: 10px; margin-left: 13px; }
    .pigeon-widget-status ul li a:hover { color: #517ABA; }
    .pigeon-widget-status ul li:first-child a { border: none; padding: 0; margin: 0; }

    @media only screen and (max-width: 600px) {
       .pigeon-widget-status ul { float: none; }
    }
</style>
How to Initialize the Status Widget
You can initialize the status widget like this. The WordPress plugin in JS Mode initializes this automatically for you.
Pigeon.widget.status();The copyMap parameter allows you to customize the copy of the status widget elements. The following are the defaults. Copy and paste the whole copyMap and adjust the terms to fit your site's copy.
Pigeon.widget.status({
copyMap:{
page:['page','pages'],
meter: '%%available%% %%page%% left',
login: 'Sign In',
logout: 'Sign Out',
account: 'My Account',
subscribe: 'Subscribe',
groupIpAccess: 'Access provided by %%profile_parent_name%%',
credits: 'Credits Left %%credit_total%%',
getAccess: 'Get unlimited access'
}
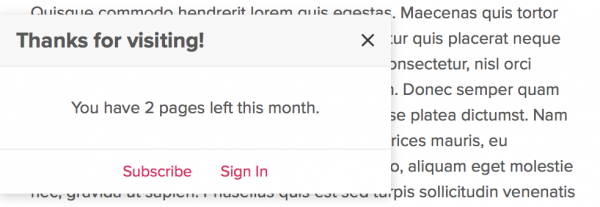
});widget.prompt()
The paywall meter prompt is a small overlay element that slides in from the left to tell readers how many free articles they have left to view. By default it contains calls-to-action to either subscribe or sign in.
You can turn on the prompt simply by adding this code:
Pigeon.widget.prompt();You can do further customizations via the settings below.
Settings
| promptMeter |
type: bool | array
|
| copyPage | type: array default: ['page','pages'] The singlur and plural form of your content. You may want to use 'article' and 'articles'. |
| customCopy |
type: object
|
| meterCopy |
type: object meterCopy:{2:{'meterMessage':'I am changed!'}} |
| simulate | type: bool | integer default: false Set any number to overwrite the meter to test what each meter prompt will look like. |
Copy Variables
These variables can be used in the meterMessage and lastMeterMessage copy settings.
- %%pigeonMeter%%
- %%pigeonMeterLimit%%
- %%pigeonMeterAvailable%%
- %%pigeonCopyPage%%
Customize Slider HTML
You can optionally add your own div.pigeon-widget-prompt block to customize the slider. If the pigeon-widget-prompt is not found, the widget renders the HTML for you. Use the following boilerplate code block as your starting point for your own slider layout.
To add a paywall meter prompt to your site, copy the code below and paste it into the footer of your site. The code below serves as a basic starting point, but you can freely modify the HTML and inline styles to match your brand and vision. All ".pigeon-*" class names are required for the prompt to work correctly, but you can rearrange and add to the code as necessary.
<div class="pigeon-widget-prompt" style="display:none; position:fixed; bottom:20px; width:320px; background-color:#fff; box-shadow:0 2px 10px rgba(0, 0, 0, 0.2); overflow:hidden; z-index:999;">
    <div style="background:#f8f8f8; border-bottom:1px solid #eee; padding:10px; position:relative;">
        <span class="pigeon-close" title="Close" style="position:absolute; top:0; right:10px; height:100%; width:18px;">
            <svg style="width:100%; height:100%; cursor:pointer;" fill="#333333" height="24" viewBox="0 0 24 24" width="24"><path d="M19 6.41L17.59 5 12 10.59 6.41 5 5 6.41 10.59 12 5 17.59 6.41 19 12 13.41 17.59 19 19 17.59 13.41 12z"/><path d="M0 0h24v24H0z" fill="none"/></svg>
        </span>
        <h2 style="font-size:18px; margin:0;">Thanks for visiting!</h2>
    </div>
    <div style="padding:25px 10px; text-align:center;">
        <div class="pigeon-meter-message">You have %%pigeonMeterAvailable%% %%pigeonCopyPage%% left this month.</div>
    </div>
    <div style="border-top:1px solid #eee; text-align:center; font-size:13px;">
        <a class="pigeon-subscribe" href="#" style="display:inline-block; padding:10px;">Subscribe</a>
        <a class="pigeon-sign-in" href="#" style="display:inline-block; padding:10px;">Sign In</a>
    </div>
</div>
Advanced Example
Scenario: A soft paywall with a seven meter limit.
This example will trigger the prompt on meter numbers 1, 3, and 6. Meter numbers 2, 4, 5, and 7 will be skipped. The meterCopy object allows you to customize the message of 1 and 3 in this example. Notice that you can include HTML in the meterMessage string for further customization.
Pigeon.widget.prompt({
    promptMeter:[1,3,6],
    meterCopy:{
        1:{
            meterMessage:'Try us out. You get <strong>%%pigeonMeterAvailable%% free %%pigeonCopyPage%%</strong> for the month!'
        },
        3:{
            meterMessage:'Are you enjoying the content? <strong>Support us</strong> so we can keep serving you.'
        }
    },
    simulate:1 // Change to 3 or 6 to simulate what each looks like
});
widget.promotionDialog()
Event
Events help you do more advanced things like tracking click events or metering multiple interactions on a single page.
Pigeon.event.click()
Track and meter click events in Pigeon. The Pigeon Event Meter Limit needs to be set in order to calculate the click event meter correctly. Contact support to set this on your account.
Example
Pigeon.event.click({
    'id':'event-id',
    'title':'Cool Title',
    'restriction':1,
    'ajaxSuccess':function(data){
        console.log(data);
    }
});
Settings
| id | type: integer or string Important if the smart meter is on. That way clicks can be remebered for your site visitor. If not set then then the click is tracked as an anonymous click. |
| title | type: string Used as a nice name to view in analytics. |
| restriction | type: integer default: 0 0 == No restriction 1 == Metered 2 == Full restriction, requires an attached plan to the account |
| ajaxSuccess | type: function( data ) The response callback. The data parameter contains the respons variables of the call. |
| modal | type: bool defaut: true Set false if you don't want to trigger the default Pigeon modal. You can trigger your own actions or modal from the ajaxSuccess function above. |
Response
| allowed | type: bool 0 == if access is not allowed 1 == if access is allowed |
| event_meter_limit | type: integer Total number of unique click events allowed |
| event_meter | type: integer Total number events used |